Tuesday, June 25, 2019

The Big Winter Update Part 2

We are back with the second part of our big winter update. In the last post, we had just finished two big projects: Rebuilding all of our portlights and refurbishing our water system.


Picking up where we left off, winter continued and we took full advantage of the dark, rainy (and sometimes snowy!) days- focusing our efforts on inside activities, while we waited for sunny, spring days.

The aftermath of Winter Storm Maya (yep, the storm was actually named Maya!)

My poor bike- conditions were sometimes difficult 

Hiking on the Olympic Peninsula 

If you recall we had issues with our batteries back in Simoom Sound on our trip last year. Not only that, they were installed in a chaotic manner, and it never really felt right. We had three 12V deep cycle batteries for our house electrical loads. Those batteries did a fairly good job of meeting our supply needs, but we never knew exactly how much charge was left in them. That's critical information for a cruising boat that anchors out a lot.
The old batteries

So the decision was made to replace and reorganize our batteries. We only have a small amount of space available for batteries, but we managed to squeeze four 6V lead acid golf cart batteries into the battery compartment. This increased the amount of power we can use, with the added bonus of all the batteries being collocated in the same spot. The only catch was having to move a diesel transfer pump and reroute a rat's nest of wires. Small price to pay for an increase in battery power.

New Batteries!

Rerouting and sorting out the rats nest of wires.

New batteries in with bracing straps- now that is sexy!


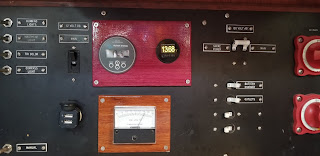
Here is our new battery monitoring system- love it!

After removing the diesel pump we had just enough space for all 4 batteries. Using special hydraulic crimping tools borrowed from school, we were able to make custom, professional level battery cables. And as part of the project, we added a new digital battery monitor system. With this device we know exactly how much energy we have left and can manage our boat accordingly.
At this point, I think the battery and associated monitoring system will be our most valuable useful project to date. That remains to be seen, but we are elated about the new system, and the amount of confidence gained by upgrading that system.

After doing a technical, boat system project, we moved our attention to cockpit seating. While we love our boat, it did not come equipped to serve a proper happy hour. With the help of the school's woodwork shop, we tackled the problem head first, making a bench seat in the far aft of the boat, an intermediate removable bench seat, and a folding table.


This project was sooooo fun and it encompassed lots of problem solving and artistic decisions. After speaking with some knowledgeable people we decided to use tzalami, which is a Caribbean hardwood. After lots of trips between the boat and school we were able to finish all the various pieces. At this point Jenny's schedule allowed for her to be in Anacortes more. And because of this we were able to work on this together.

Jenny working on shaping our new bench seat

After a bunch of layers of varnish we installed our new projects and have loved them ever since. It really opens the boat up and makes it more comfortable.
A special shout out to our friend Evan, who built the top of our cockpit table- he even used old growth fir, which is a beautiful and rare type of wood. Thanks so much, Evan! You rock!

Varnishing the various pieces

New projects installed on Maya and looking great- we love it

Those were two of our bigger projects, but we also had a bunch of smaller projects which included cleaning out our diesel tanks, fixing our windlass, and general upgrades in organization in preparation for our big trip. These projects ensured we didn't get bored and boosted our confidence before our big summer trip.

Cleaning our dirty diesel tanks


Diesel tanks cleaned!

New anti siphon loop installed on our engine- this is a simple yet crucial installation for our diesel engine. It ensures that a siphon does not occur which would cause saltwater to flood the engine... ruining the engine.


At this point the days were getting longer so we managed to get a bunch of mini trips in the islands. We were lucky enough to be able to bring out family on several trips, which was so fun. These trips also served as practice for our big trip coming in the summer- testing out new batteries among other systems.


Fun wedding in Leavenworth- Congrats Tim and Alex!


Cool tree on Matia Island

We went fishing with our friend, John, and Jenny caught a Lingcod!

Hiking on Cypress Island

Family outing to Sucia! Thanks for coming, Chris and Bridger!


Happy hour aboard Maya (note the table is being put to use!)


Highlights from our Winter Backcountry XC Skiing Trip 


Monday, June 3, 2019

The Big Winter Update (Part 1)

Ding Ding Ding! Did you hear that? That's the official start of blog season!


We are back with lots of updates on what the heck we have been doing since the end of our first cruise back in October. Spoiler alert: WE HAVE BEEN BUSY!

Highlights from our adventures with portlights and hatches


Video from of our water tank projects


Stepping back in time to last October, we had just finished our first big cruise with Maya through the Inside Passage of British Columbia. We had an amazing trip and came home with a massive to-do list for the boat. With winter approaching, we quickly got to work.

Happy Halloween!

Maverick and Disco

The first major task we needed to tackle was our portlights and deck hatches.... literally all of them leaked. We have 7 portlights and 2 hatches in total, all of which are original to our 40 year old boat. After discovering that our portlights are $800 EACH, we decided that purchasing new ones was not an option, we decided to rebuild them.

One portlight- you can see water was leaking through the gasket material

After pulling the faceplate off you can see how much water intrusion there was

Sizing up the project, we thought the portlights and hatches could be done in a week.... well I'll tell you we are a little wiser now because that job took TWO MONTHS! Two months of scraping, taping, sealing, and all the other crap that went into them..... nine times over.

The job was painstaking and slow, but served as a great learning opportunity. We can proudly say that our boat does not leak at all anymore! Which is a good thing because the PNW winter proved to be a cold wet one!

Cleaning up the surface for new butyl tape (a sealant)

A closer view

Jenny scraping an old portlight- each one needed to be spotless for new sealant

So much prep went into each and every portlight


Portlight glass ready to be rebedded- this was the scariest part of each portlight.... no mistakes allowed!


So by the time the hatches and portlights were rebuilt Jenny found a contract Pharmacist job down south of Seattle. Unfortunately, the location of the job was too far to commute to from the boat so Jenny's sister was kind enough to let her live at her house in Seattle during the week, making the commute bearable. The job came at the right time as the winter here in the PNW is dark and wet... Jenny worked hard getting our cruising kitty fund back in order, not to mention all of the boat parts that Maya needed.

So while Jenny was working, I was up at the boat lounging around and sipping Pina Colodas.... actually not quite. Instead of lounging around, I enrolled in a Marine Technician program at a local community college where I became a full time student learning about diesel engines, boat electrical systems, marine drive train systems, among other things! School provided an amazing opportunity to get hands on experience with engines - deep diving inside them and learning an incredible amount.

As if the school program wasn't cool enough, on campus, there's a huge workshop with a bunch of very knowledgeable people to draw from.  If I had any questions about something on Maya, I could bounce ideas off experts and use the vast array of tools the workshop had to offer.

School! What an amazing place!

Those tools and experts came in very handy when we discovered our water tank was going bad! As part of getting the boat ready for our next trip, I opened up the water tank to inspect and clean it. Much to my chagrin, I found it corroded and in bad shape. What was going to be a simple inspection and cleaning turned into a much bigger project. The first step was to get the tank out of the boat. Removing that tank proved to be a challenge, but after a struggle it was free and we could see what was causing the issue.... corrosion. 

Our main water tank during the initial inspection

Horrified at what we found! 

You can see severe corrosion on the inside... the outside was even worse

The gaping hole left after removing the water tank. That greenish white on the bottom is a copper sheet 


The tank is aluminum and was installed directly above a copper sheet used by another system. Unfortunately, when copper and aluminum are in contact (or even close to one another) corrosion occurs. Because of that corrosive interaction our main water tank was severely damaged at the base. I brought the tank into school and had the experts look at it where we came up with a plan to save it:  chop off the bottom and reweld a new piece of aluminum to it. This removed the worst of the corrosion, while sparing us the cost of a new tank.
It turns out that a fellow student is a pro welder, so I gave him $100 and some beer and a few days later he returned our new spiffy tank... ready to be put back into use! To put into perspective, having a new tank made would probably have run us over $1500... I love school! 

New spiff-a-fied tank!

Not only did we save a ton of money, we can cruise more safely and comfortably with the knowledge we have a clean water tank. While it felt great to have that tank back in, there was no time to rest, because we needed to  focus on our other water tank (which we had never inspected either). When the time came, I nervously opened the tank and, thankfully, didn't find the corrosion that the other water tank had. What I did find was a somewhat dirty tank, which was in need of a thorough cleaning. Additionally, we decided to install a water tank gauge in order to see how much water the tank had.

Our front water tank sits under those boards- our mattress sits above that.... not easy to get access to!

What a mess.... working on cleaning this tank and installing a tank level gauge

Knowing how much water you have aboard is critical to safe cruising, as potable water is often not available for miles, as is the case in the Inside Passage. The problem with our front water tank is that it sits in the Vberth, under our blankets, mattress, and boards, which can't be easily taken off. The solution was to install an electrical tank gauge that we can monitor with a simple flick of a switch. This project proved to be super fun and satisfying as I got to use my knowledge and skills from school to use, taking care to run wires in an organized fashion with proper terminations and labeling. With the gauge in, we can simply flick a switch to know how much water we have, without tearing apart our bedroom.

New water tank gauge!

What the electrical connections look like. Done right the first time!

After hundred of hours of work, we are a leak-free boat, and clean water tanks that we can trust. We are much closer to confidently heading out on our next cruise.

As stated earlier, this is the start of blog season so we will be publishing blog posts more often.

Check back soon as I continue to detail the rest of our boat improvements and the start of the 2019 cruising season!
Thank for reading and we hope to see you soon!